Bricks Builder
Learn how to display labels for product layouts created via Bricks Builder theme.
Learn how to display labels for product layouts created via Bricks Builder theme.
Bricks Builder is a premium WordPress theme that includes a powerful visual page builder. With its help you can create complex WordPress websites and use a built-in template to make this process even faster.
We are happy to say that the Advanced Woo Labels plugin has full support for Bricks Builder. You can display labels for each WooCommerce products blocks that are built via Bricks Builder. Also you have full control on how and where to display these labels.
Bricks Builder query loops is a powerful feature that allows you to query your database (according to your query parameters) and renders the query results you want to show inside the loop (dynamic data).
For our particular case we are interested in displaying WooCommerce products inside such loops. And then show AWL plugin labels for such products.
Here are steps to create a custom query loop to display the latest products on a separate page:
1. Create a new blank page and then click on Edit With Bricks button.

Edit With Bricks button
2. Bricks builder page will be opened. First of all add Container full-width element to your blank page. Then open this element settings -> Content tab and set the following options for it:
Flex wrap: Wrap
 Direction: Horizontal
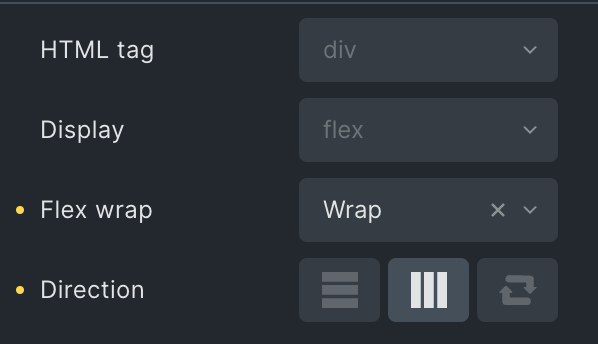
Container content settings
3. Add a second new Container element inside the first one. Open this element settings -> Content tab and enable Use Query Loop option for it.
Then click on the Query button to set custom query parameters. Most important one - set Post Type parameter to Products. Other query parameters you can set on your choice.
Also open Style element tab and for Layout -> Width option set value of 33%. This will display 3 products in the row. Set any other value here if you want.
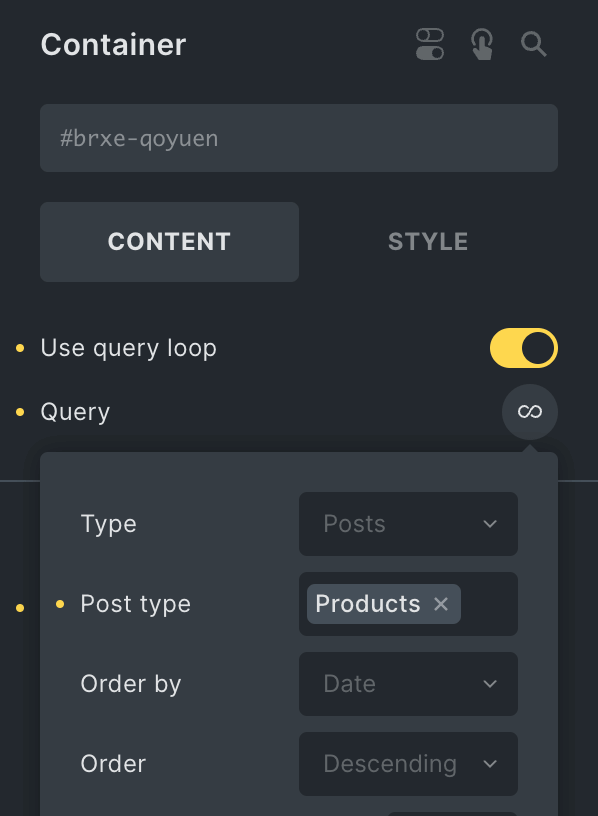
Container with custom query loop
4. Now we need to set some content that must be displayed for our products inside a custom query loop. All elements that are specified below must be added inside the second Container element.
First let's add Heading element. As it content, set the following dynamic value: {post_title}.
Then add Product Price element.
Then Add to cart element.
Lastly add Image element. Inside its settings add {featured_image} as its dynamic data. Also don't forget to specify appropriate image size.
So the structure of the page must look something like that:
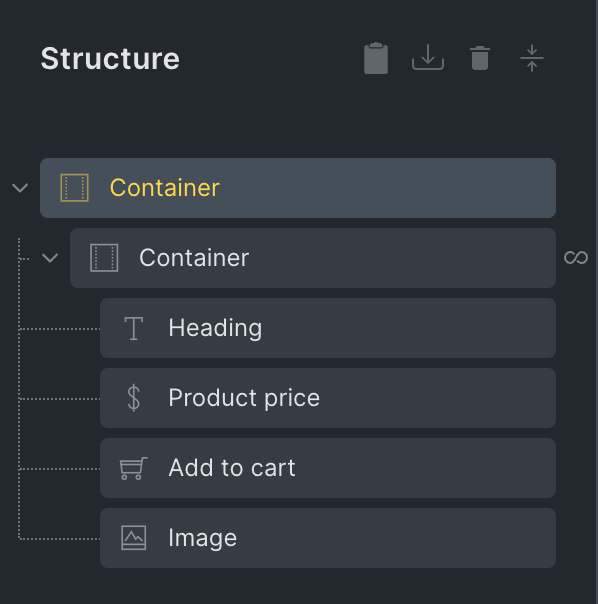
Page structure inside Bricks editor
5. That's all! Just click Publish button and view your newly created page. It must display WooCommerce products according to specified query parameters.
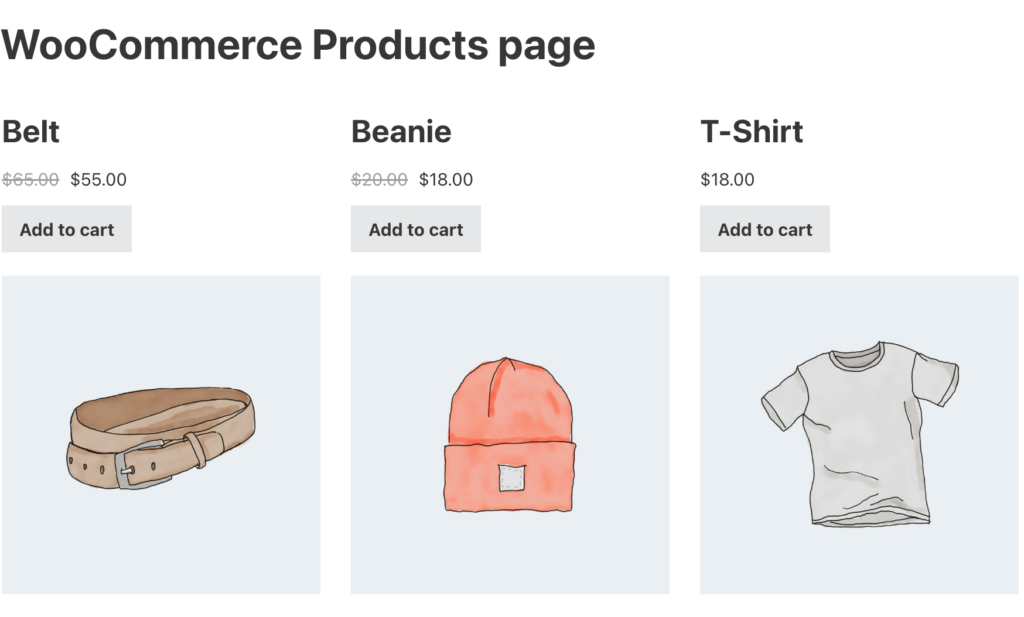
Page with products custom query
One thing that you can notice from the previous example is that we don't see any labels for our products. The trick here is that for Bricks custom queries you need to manually place labels shortcodes to the needed places in order to display the theme.
To display product labels we will use awl_get_product_labels shortcode. More about label shortcodes you can read here: Shortcodes.
For example, we have two labels that we want to display: Before title label and On image label. They are placed respectively before product title and overlapping product image.
Here are steps to display these two labels for the previously created products custom query:
1. Add Shortcode element just before Heading element.
As a content for this shortcode specify the following value: [awl_get_product_labels position="before_title"]. Such shortcode will display labels that have position Before Title.
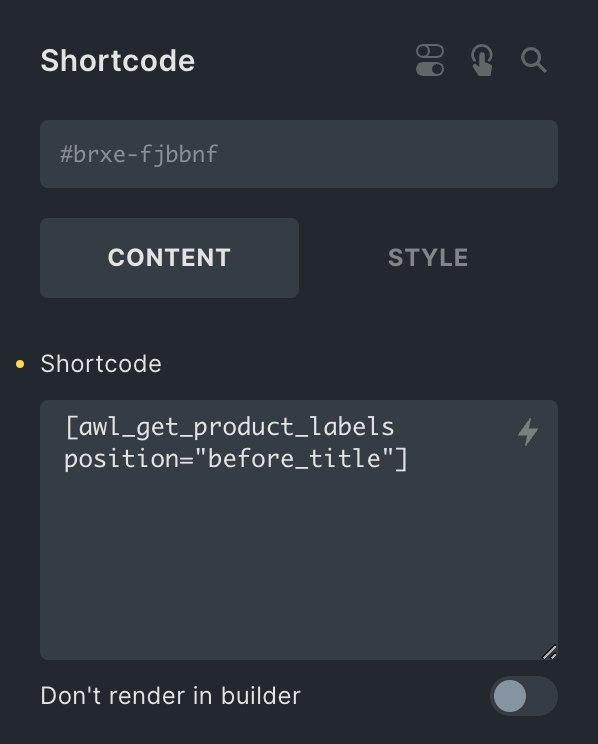
Shortcode element for labels
2. Now we need to display a second label with position On Image. Such labels must have an overlapping product image, so it is a bit complex way of adding it.
First - add Div element and add a previously created Image element inside it. Open this Div element settings -> Style tab and set following custom css value: root {position: relative;}
Second - create Shortcode element and add it inside the newly created Div element.
As a content for this shortcode specify the following value: [awl_get_product_labels position="on_image"]. Also open Style tab and set following custom css value: root {position: absolute;}
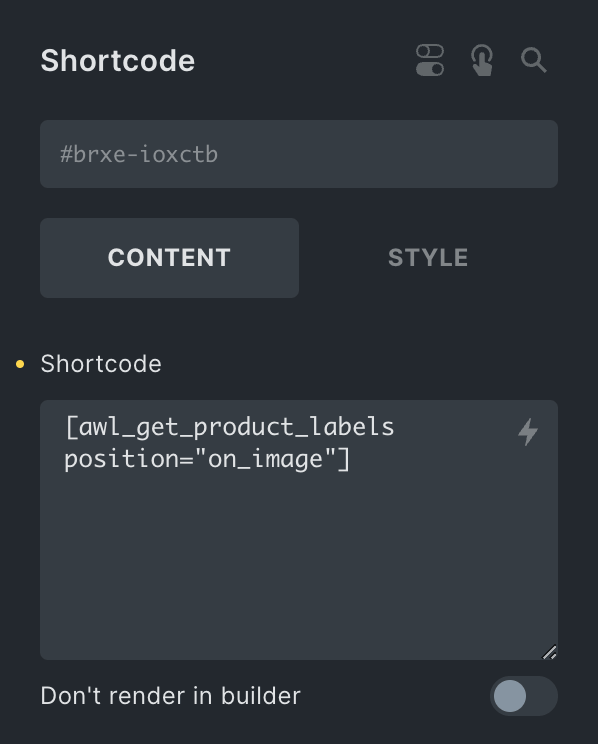
Shortcode element for labels
3. Final structure of your page must look like this:
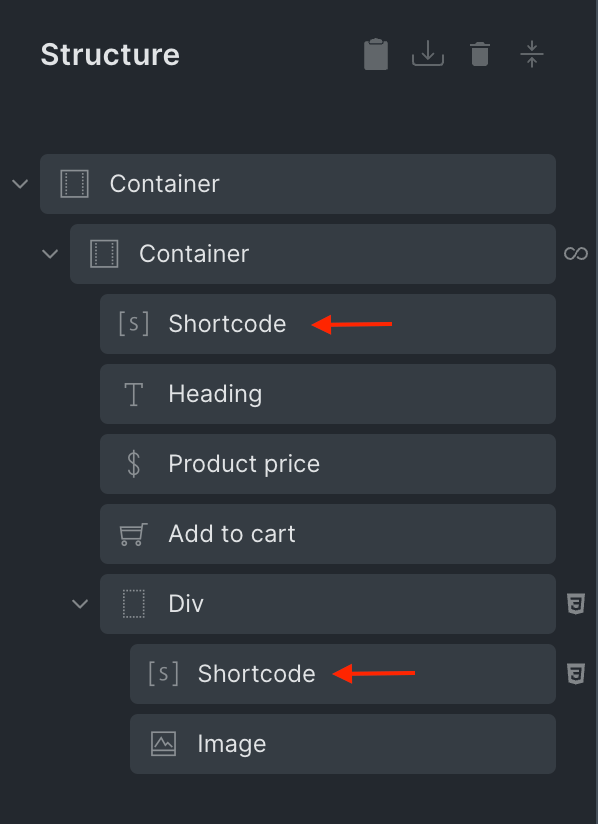
Structure of query loop with labels shortcodes
Now just publish all page changes and check it. Products inside a custom query now must display your labels in two different locations ( of course, if products meet specified display conditions ).
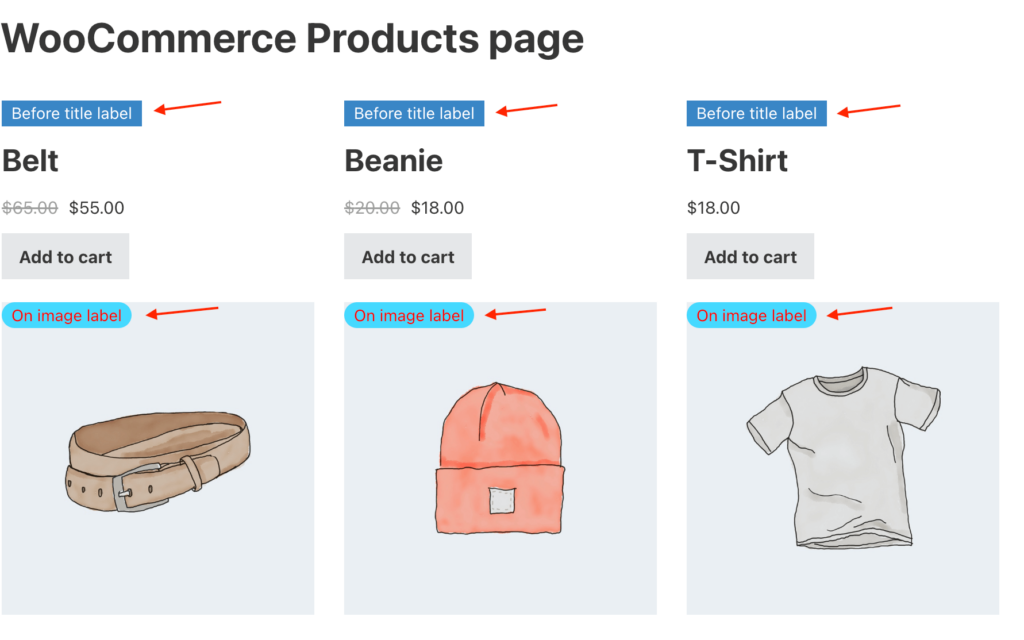
Page with products custom query and labels
Easiest way to add display your products on any page via Bricks Builder is to use WooCommerce Products element.
Just add this element to any place of your current page layout to display products grid with highly customizable options.
Another great thing here is that product labels will be displayed for this WooCommerce Products element automatically. You don't need to make any extra steps here - if the product meets label display conditions - labels will be displayed for it in the desired location.
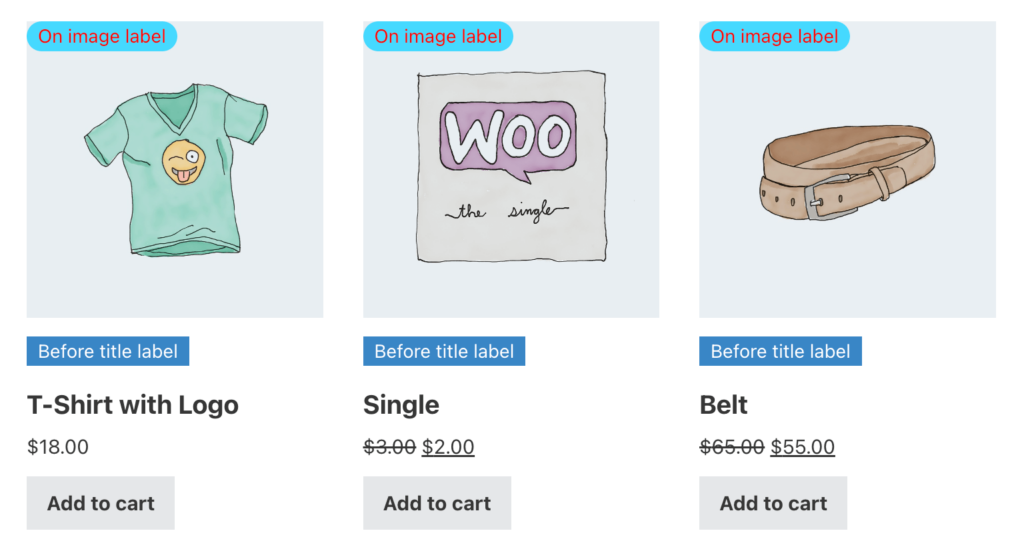
Labels inside Products element
When using the Bricks Builder WooCommerce Products element you have a great option to hide labels for all products inside this element. It is useful if you decide to not to use labels for this specific block of products and instead of something else ( for example, default labels instead ).
Here are steps to disable labels display for specific WooCommerce Products elements:
1. Open Brick Builder editor and add/find WooCommerce Products element.
2. Open element settings -> Content tab and then find Advanced Woo Labels section. Open it and turn on Disable labels option.
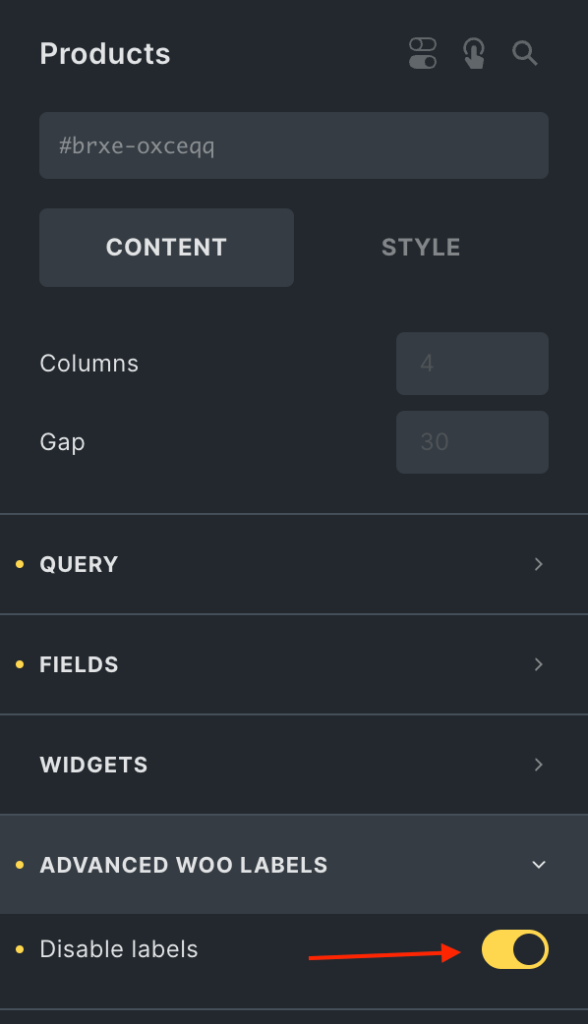
Option to disable labels for Products element
3. That's all! All labels for products inside this element must be hidden.
But what to do if you want to hide inside WooCommerce Products element not all labels but only specific ones? In this case you can use special display condition to achieve this.
Follow these steps to hide or display specific labels for all WooCommerce Products elements:
1. Open label edit page.
2. Find the Label conditions box and create new condition:
Bricks: Is WooCommerce block -> Equal to -> No
This will hide specific labels from all products inside Bricks Products elements.

Label display condition based on Bricks elements