Overview
This article will cover how to replace your default On Sale label with the new one created via Advanced Woo Labels plugin.
On Sale labels are a very popular type of labels that are used almost for all existing shops. Each WordPress theme has its own set of styles for such labels. Therefore, the issue of customization of such labels is quite acute.
Take a note that in another article we cover the steps of customizing another very popular label type - Stock status.
Here is an overview of steps to follow in order to replace the old Sale Status label with the new ones:
1. Hide old labels. This can be done via the build-in plugin option.
2. Create a new plugin and use a special display rule to show it only for products that are on sale.
Below we will cover these steps in detail.
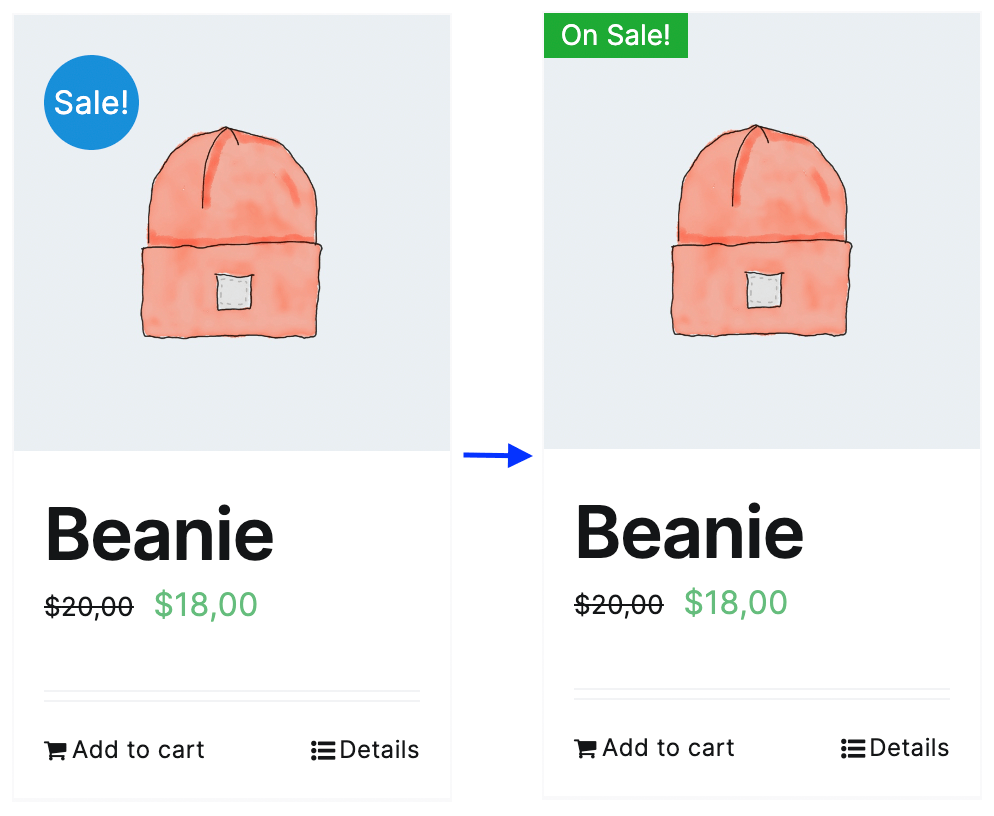
Replace the default on sale label with the new one.
Hide default 'On sale' label
First - let's hide default On Sale labels. After that we will create new ones that will be shown instead.
This step is pretty easy. Just go to the plugin settings page and set Show default 'sale' label option value to Hide.

Option to hide default sale labels
Then go to your shop page and make sure that all products with On Sale status don't have these labels anymore.
Create new 'On sale' label
Now, when the default On Sale label is hidden, let's create our new label via Advanced Woo Labels plugin.
Open Adv. Woo Labels page and click Add Label button.
Then follow these steps:
1. First let's specify label display conditions and show it only for products that are on sale. To do that, simply add the following condition rules:
Is on sale -> equal to -> Yes
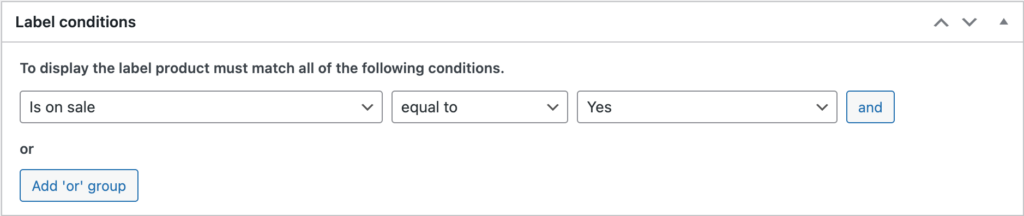
Label display conditions
2. Then specify some text for Label text field. You can add any text that you want. In our example we will add On Sale! value.

Label text option
3. Additionally set any other label options like style or layout. In our example we additionally add green color for Label Color option.

Label color option
4. When you are ready - just hit Publish button and check your shop page - all products with On Sale status must display this newly created label.

New label for on sale products
Create a label with a sale discount
Let's look at another example of On Sale label.
For example - we want to show discount percentage instead of just bold text On Sale. This is also possible and below we will cover how to do that.

Steps to create a label with discount percentage:
1. Open Adv. Woo Labels page and click Add Label button.
2. We need to display this label only for products that are on sale ( overwise discount percentage will be always zero for non-sale products ). So let's create the following display condition:
Is on sale -> equal to -> Yes
Label display conditions
3. Then we need to use text variables to display discounts for every product. This can be done by placing {SAVE_PERCENT} inside Label text field. Additionally you can add any other text there.

Label text option
4. Additionally set any other label options like layouts or styling.
5. When ready - hit the publish button and check your label for products that are on sale. Label must display something like 10% OFF as its content.
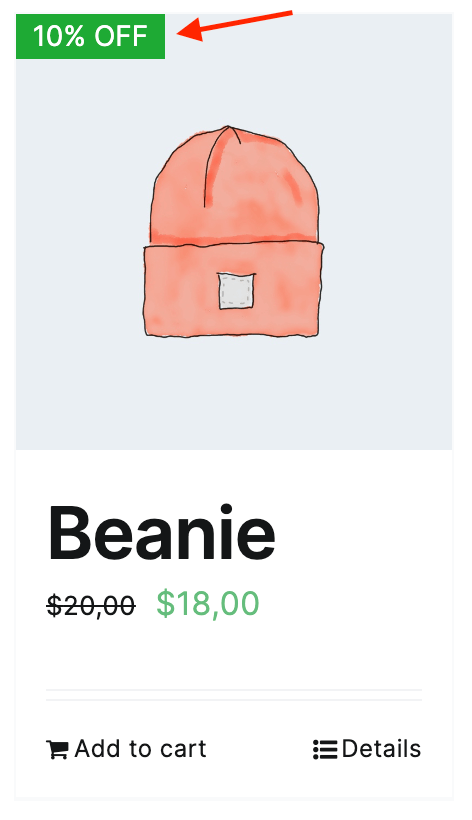
New label with discount for on sale products